|
Getting started
The first order of business is to clear off your
workbench. I mean sand it down, wipe the particles
and blow all the dust off. The reason is that any
debris or glue boogers that you have there will tear
up your delicate skins when you are assembling and
sanding them.
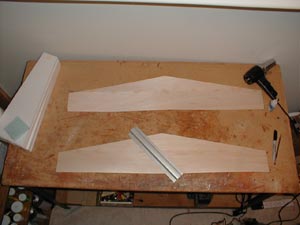
Take your 36" metal ruler and trim the edges
of the sheet you will be joining to make your skins.
They look straight, but are usually 1/8" or so
warped. Once trimmed, lay them on wax paper and use
CA glue to butt-tack them in spots rubbing the glue
as you go. Do this in 4" intervals, just enough
to keep the sheets together while you handle them.
Sand both sides of your skins until they are baby-smooth.
There are two secrets in making a light wing. One
of them is to sand the balsa until it's baby smooth
so it won't absorb as much of the resin later on.
|
|
|
 |
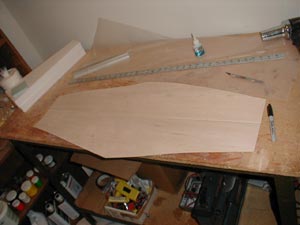
When your skins are sanded, cut out a pattern that
is larger than the core blanks that you are bagging.
I like to make my skins overlap by ¼"
on the LE and tips, and 5/8 or so at the TE. The TE
is longer because a lot of glue ends up there after
being bagged-you get to trim it off rather than keep
all the extra weight. This is as much as .3oz, so
plan accordingly when making your skins! There is
a limit though, if TE is too long, it will warp badly
in the bag and be a pain to carve and shape properly.
I'll explain what to do later if this happens.
Mark your top skin now for the position of the fiberglass
pieces if you are using any.
|
 |
|
 |
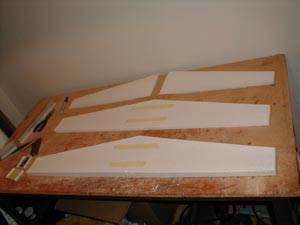
The wing we are making here
has a straight TE. This makes life easier for me because
I get to tape the skins together in an envelope for
easier handling. The tape also keeps the glue from getting
on the inside of the bag, extending bag life. |
| |
|
 |
Assemble the core - beds - into the proper pairs
with masking tape. The upper and lower cores will
keep the wing straight and compressed evenly in the
bagger, and later serve as a sanding/drilling jig,
and shipping protection. You'll want to handle the
cured wing as little as possible once cured because
its easy to dent is when getting frisky with the sanding
tools. If at all possible, perform as many operations
as you can with the cured wing sitting in the cradles.
Also note since you are bagging this wing in one
piece, the dihedral of your wing is determined by
your cores-not your spar. When you place the wing
in the bag, the vacuum pump could not care less if
there is a spar sticking out through the skins! For
this reason, trial fit the spar in the cores while
the cores are in their beds and the cradles are on
a flat surface.
|
| |
| |
|
| If you have dihedral, the tips of the
wing cores will be higher than the roots and the spar
will be cut to the proper angles. You can't see it in
the photos, but this wing has dihedral. The top of the
wing is flat, the only dihedral it has is provided by
the difference in root and tip core thickness. Just
enough for stability, but not enough to pay a penalty
when flying inverted. |
|